
The promise of no-drill brackets is fast, easy installation. Here's the complete walkthrough so you get it right the first time — including the leveling tips most people skip that cause crooked curtains.
What You'll Need
- Tape measure
- Pencil (for light marking)
- The brackets (Evermount includes a level and pin guide)
- Your curtain rod
- Your curtain panels (to hang at the end)
That's it. No drill, no screwdriver, no anchors, no level (the brackets include one).
Step 1: Decide on Rod Height
Standard guidance is to hang your rod 4-6 inches above the window frame and extend 3-4 inches on each side beyond the frame width. This makes windows look taller and wider — a classic design trick.
For blackout purposes, hang the rod closer to the ceiling. The higher the rod, the better the light block at the top. For aesthetics, higher usually looks better too.
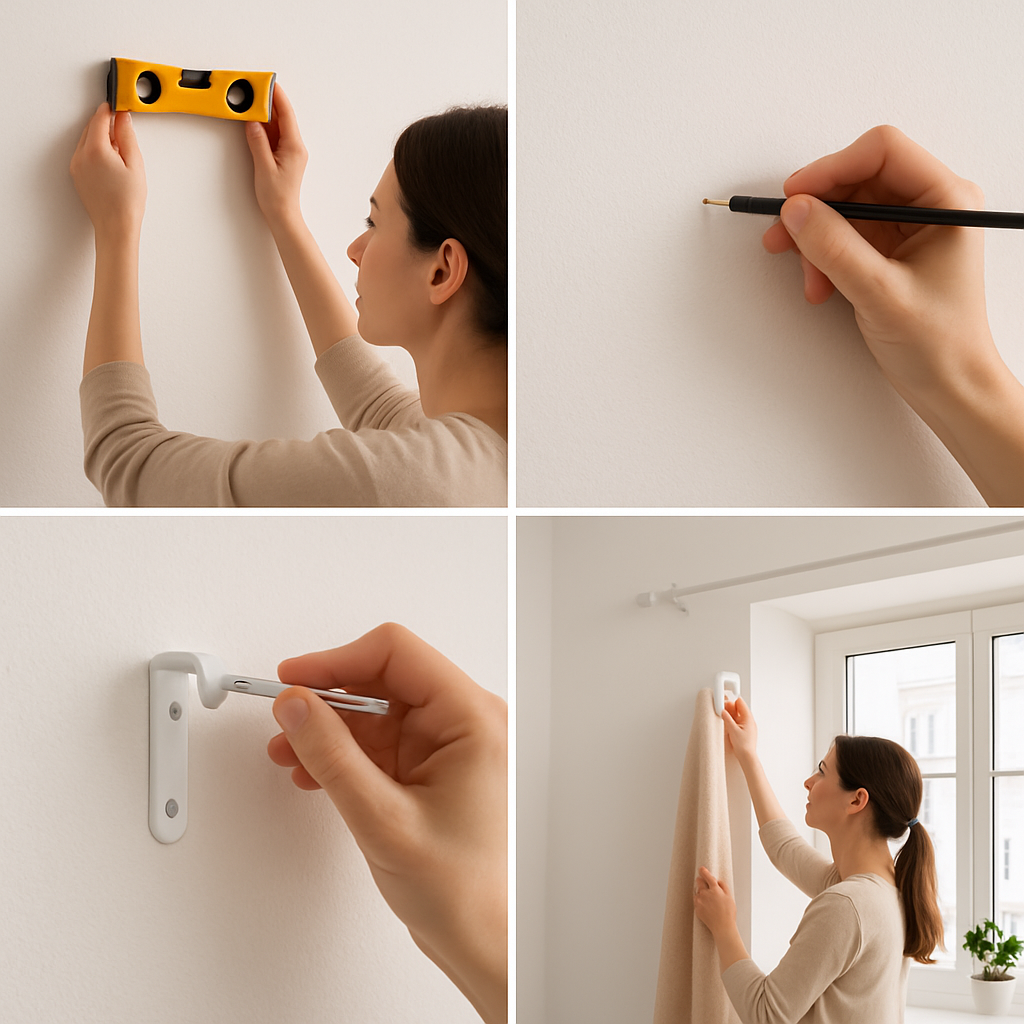
Mark your desired height with a pencil on one side of the window.
Step 2: Find Level Bracket Height on Both Sides
This is where most people mess up — marking both brackets without checking level, then ending up with a tilted rod.
With pin-based holders like Evermount that include a built-in level guide:
- Mark your left bracket position
- Hold the level guide horizontally against the wall at your marked height
- Extend it to where the right bracket goes and mark that position
If your brackets don't include a level, use a standard bubble level or even a leveling app on your phone.
Step 3: Install the First Bracket
With pin-guide systems:
- Position the bracket at your mark
- Make sure the bracket is level (use the built-in indicator)
- Press the pin guide firmly into the wall — the pins will sink into drywall with steady hand pressure
- The bracket snaps or clips onto the pin guide
Step 4: Install the Second Bracket
Repeat for the other side. Use the level guide or measurement to match the height exactly. Check with a level across both brackets before committing.
Step 5: Add Center Support (If Needed)
For rods over 72 inches wide, install a third bracket in the center. This prevents the rod from bowing under the weight of heavy curtains. Measure to find the midpoint between your two end brackets.
Step 6: Load and Hang
- Thread your curtain rings or rod-pocket curtains onto the rod before inserting it in the brackets
- Set the rod in the bracket hooks
- Arrange the curtains evenly
- Stand back and check the level — if it looks tilted, adjusting a pin bracket is easier than you'd think; just gently pull the bracket off and reposition
Troubleshooting
Bracket isn't sitting flush with the wall
The pins may have hit a harder spot or slight wall texture irregularity. Press firmly and consistently. If it won't go flush, try repositioning 1-2 inches to the left or right where the wall surface is smoother.
Rod looks tilted even though brackets are level
Check the rod itself — some inexpensive rods are slightly bent from the factory. Also check that the rod is sitting all the way into both bracket hooks at the same depth.
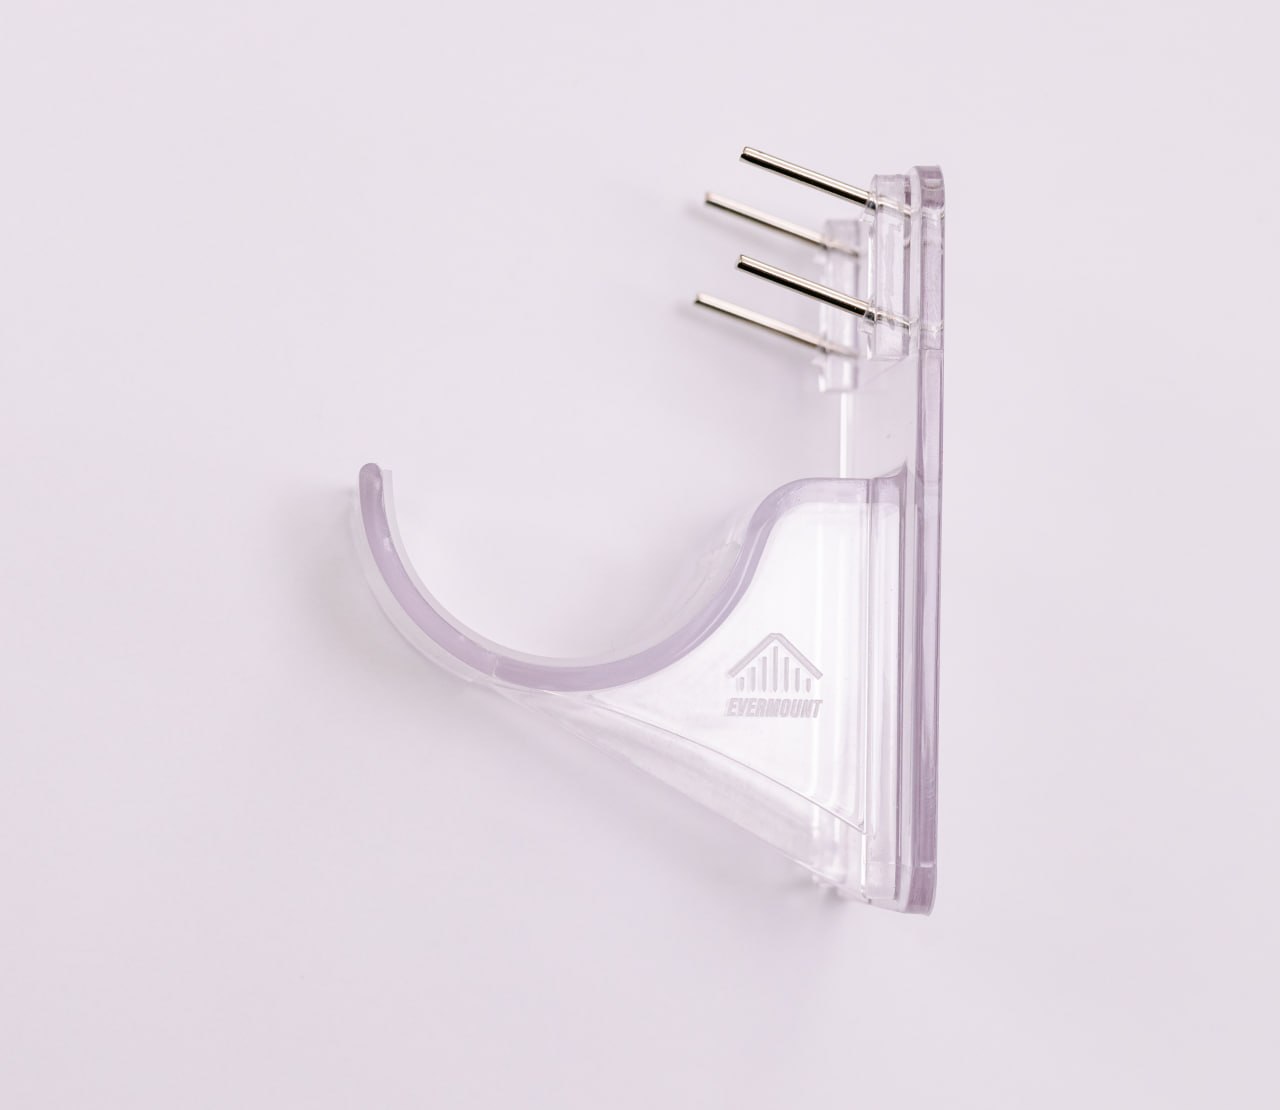
Evermount Curtain Rod Holders — 8-Pack
Includes built-in level and pin guide for easy alignment. Works with 1.25" diameter curtain rods. The 8-pack gives you enough for 4 standard windows or 2-3 windows with center supports. Near-zero wall damage.
Check Price on Amazon →